Mint and transfer semi-fungible token#
You have a contract instance which means you have an empty state and are ready to mint some tokens! You will be using this metadata and minting 100 of this cool image.
Create a folder called nft-artifacts and create a JSON file called mint-params.json in the folder to execute these steps properly. In the JSON file, you are going to give the minting parameters to the MintParams which you worked on a little in the beginning.
{
    "owner": {
        "Account": [
            "<YOUR-ACCOUNT-ADDRESS>"
        ]
    },
    "tokens": [
        [
            "01",
            [
                {
                    "url": "https://gateway.pinata.cloud/ipfs/QmZ3939dLLFzvYZjFnkdqACe2n9TQA8Rx4efbjaYTXteeu",
                    "hash": "f982b4603b9c116598d381d1aee90a7b5332377b209b6bbd8d7a4dfab18f2a80"
                },
                "100"
            ]
        ]
    ]
}
Then run the command below to invoke the mint function with the given params.
concordium-client contract update <YOUR-CONTRACT-INSTANCE> --entrypoint mint --parameter-json nft-artifacts/mint-params.json --schema dist/smart-contract-multi/schema.bin --sender <YOUR-ADDRESS> --energy 6000 --grpc-port 20001
You have just minted your semi-fungible token successfully.
View contract state and metadata#
Now check the state of your contract. Remember this is a state-keeping machine. You will use the extracted schema file to view what is going on with your smart contract. Run the following command; you will need to know your contract index and have the schema file.
concordium-client contract invoke <YOUR-CONTRACT-INSTANCE> --entrypoint view --schema dist/smart-contract-multi/schema.bin
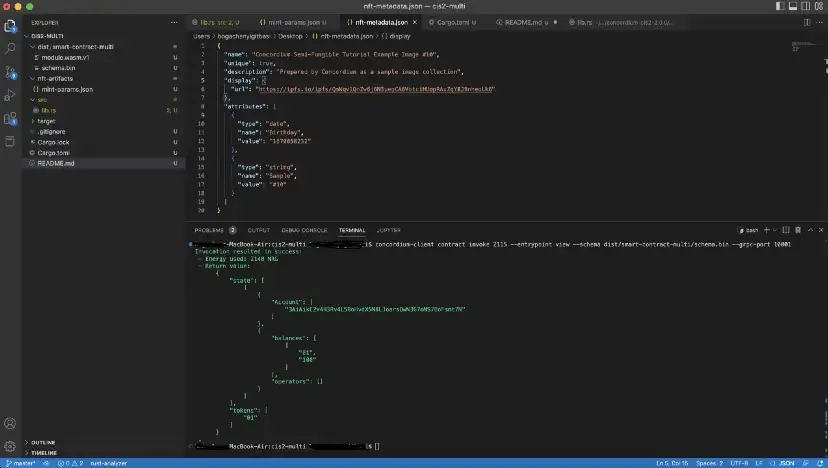
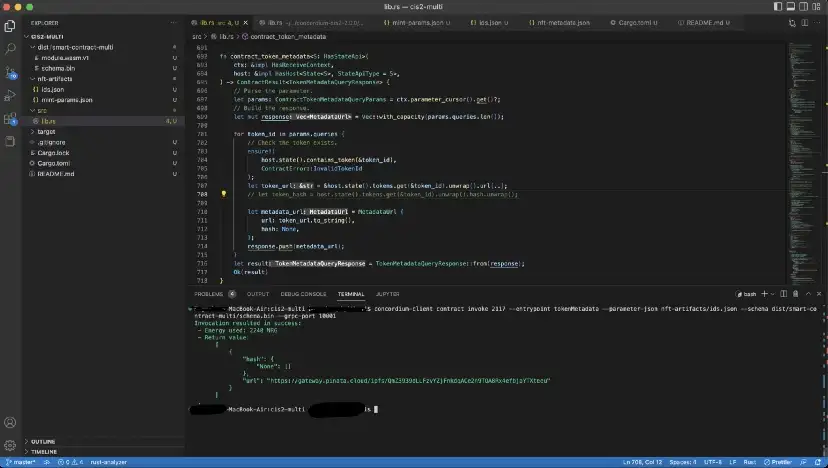
Your account has 100 tokens with id 01. To check the token’s metadata, create another JSON file called ids.json. You will invoke the tokenMetadata function from your contract. It accepts parameters as a vector so you can query multiple tokens at the same time. When you have created your ids.json file and typed the token_ids you want to query with the format ["01"], run the command below.
concordium-client contract invoke <YOUR-INDEX> --entrypoint tokenMetadata --parameter-json nft-artifacts/ids.json --schema dist/smart-contract-multi/schema.bin --grpc-port 20001
The metadata URL is stored permanently on Concordium.
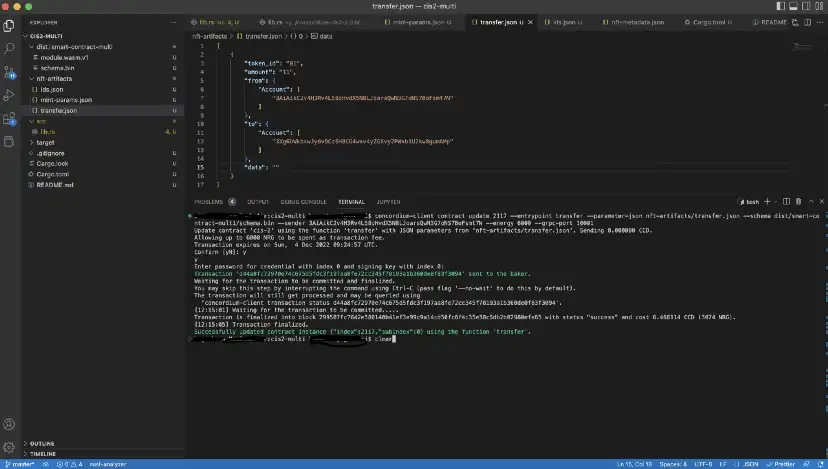
Transfer the token#
The final step is to send the token this account has to someone else. To do that, create another JSON file called transfer.json to give the parameters as input.
[
    {
        "token_id": "<YOUR-TOKEN-ID>",
        "amount": "1",
        "from": {"Account": ["<OWNER-ACCOUNT>"]},
        "to": {"Account": ["<RECIPIENT-ACCOUNT>"]},
        "data": ""
    }
]
Once your transfer.json file is complete, run the command below.
concordium-client contract update <YOUR-INDEX> --entrypoint transfer --parameter-json nft-artifacts/transfer.json --schema dist/smart-contract-multi/schema.bin --sender <YOUR-ACCOUNT> --energy 6000 --grpc-port 20001
The transfer is successful.
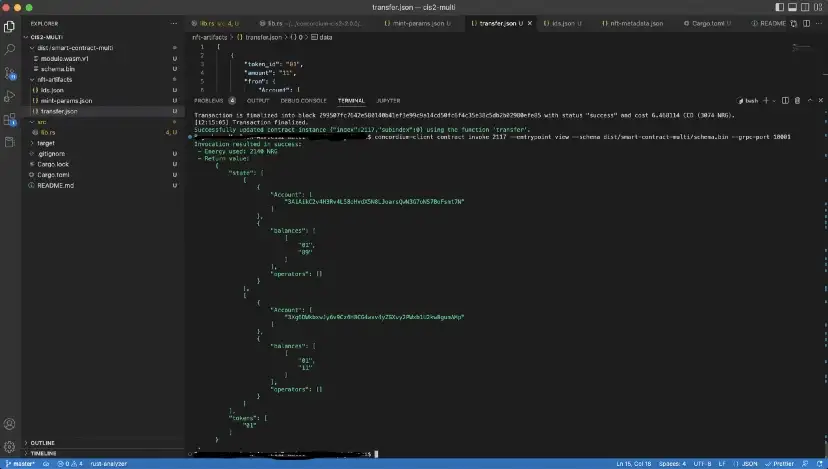
Finally, check the state of the contract once more to see who has how many semi-fungible tokens with the view command which you used in the previous section.
As you can see the second account has 11 tokens with id “01” which is removed from the first one.
You have now completed the SFT minting tutorial.
