Deploying the piggy bank smart contract#
This is the third part of a tutorial on smart contract development. So far you have written and tested a piggy bank smart contract in the Rust programming language.
This part focuses on how you can deploy your developed piggy bank smart contract to the Concordium testnet and interact with it.
Preparation#
Before you start, make sure you completed the previous parts of the tutorial and have a running testnet node that has caught up to the head of the blockchain and an account with some CCD setup.
Building a Wasm module#
You have already built a Wasm module from your piggy bank smart contract in a previous part of this tutorial.
Repeat this step since you might have done some changes to the smart contract code in part 2 of this tutorial. Go to the folder where you saved your piggy bank smart contract and use cargo concordium build to create a Wasm module.
$cargo concordium build --out piggy_bank_part2.wasm.v1
Note
This command outputs the module piggy_bank_part2.wasm.v1 to the project’s root folder.
Note
When you use the above command without the --out flag, you can find the module in the folder ./target/concordium/wasm32-unknown-unknown/release/.
Use the Wasm module file suffixed with v1 when deploying to the chain. The piggy_bank_part2.wasm file (without the v1 suffix) is not the v0 module, but rather the raw Wasm module produced by cargo.
The v1 suffixed module has been stripped for debugging information, which makes it significantly smaller.
The piggy_bank_part2.wasm.v1 file can be deployed to the Concordium chain. Transfer the piggy_bank_part2.wasm.v1 file to the place where you are running your concordium-client tool. Navigate to the folder as well.
Deploying a module#
You are now set up to deploy the piggy bank module to the testnet chain. Give the module the name piggy_bank_part2_module so it can be referenced in this tutorial.
Note
Remember to adjust the following commands when you are running your concordium-client tool locally and want to connect to your node on the server. You can look up the different options on how to connect the concordium-client tool to your testnet node here.
Note
Names are only stored locally in the concordium client configuration.
They are not visible to others on the chain. This is the case for all contracts, modules, and account names/aliases.
$./concordium-client module deploy piggy_bank_part2.wasm.v1 --sender <account-name> --name piggy_bank_part2_module --grpc-port 20001
If everything works correctly the output has a green line with your module reference.
Module successfully deployed with reference: <module-reference>.
Module reference <module-reference> was successfully named 'piggy_bank_part2_module'.
You can find additional information about deploying a module in this guide.
Note
Deploying the piggy bank module will fail with an error message if a module with the exact same hash (the <module-reference>) has already been deployed.
If you compile the same contract on different systems or versions of rustc, then their hashes will often differ.
You can continue this tutorial by using the module reference printed in the error message instead of the name `piggy_bank_part2_module`.
Error: Module deployment failed:
Module <module-reference> already exists.

Initializing a module#
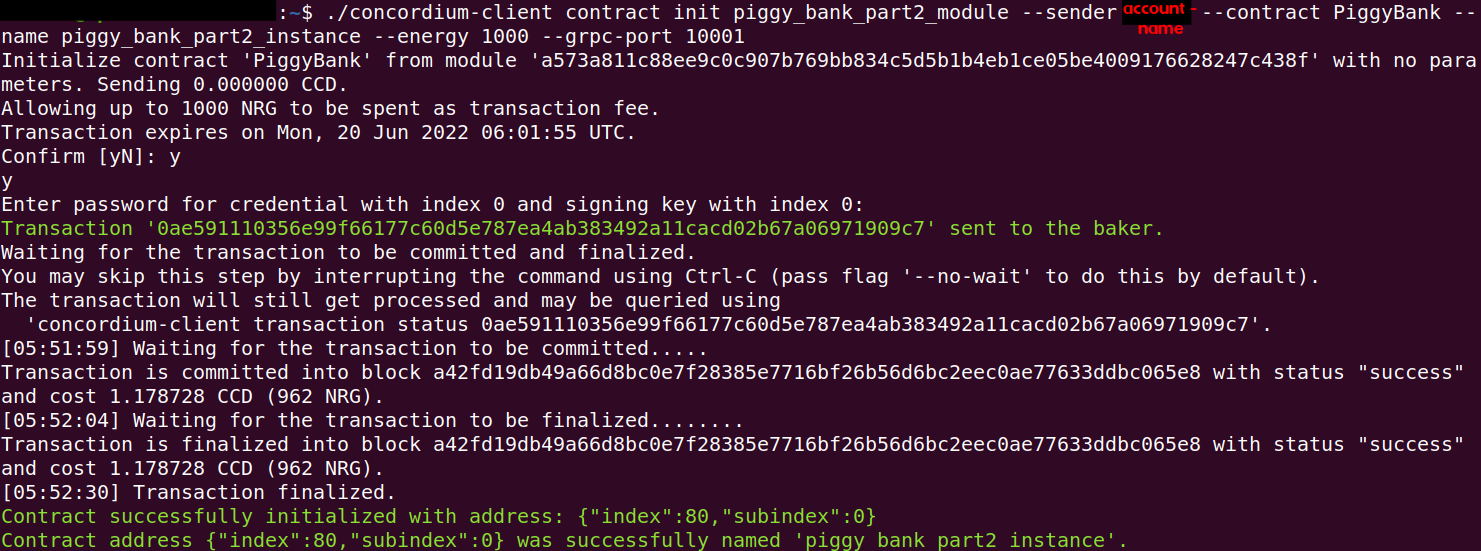
You can initialize your smart contract now to create a smart contract instance. Give the instance the name piggy_bank_part2_instance so it can be referenced in this tutorial.
$./concordium-client contract init piggy_bank_part2_module --sender <account-name> --contract PiggyBank --name piggy_bank_part2_instance --energy 1500 --grpc-port 20001
Note
1500 is enough energy to initialize the piggy bank smart contract but you
might need more energy for larger smart contracts. The --energy parameter sets the maximum allowed
energy to be used. You only pay for the actual energy used.
If everything works correctly the output has a green line with your smart contract instance index.
Contract successfully initialized with address: {"index":<smart-contract-instance-index>,"subindex":0}
Contract address {"index":<smart-contract-instance-index>,"subindex":0} was successfully named 'piggy_bank_part2_instance'.
You can find additional information about initializing a smart contract instance in this guide.
Updating the piggy bank smart contract#
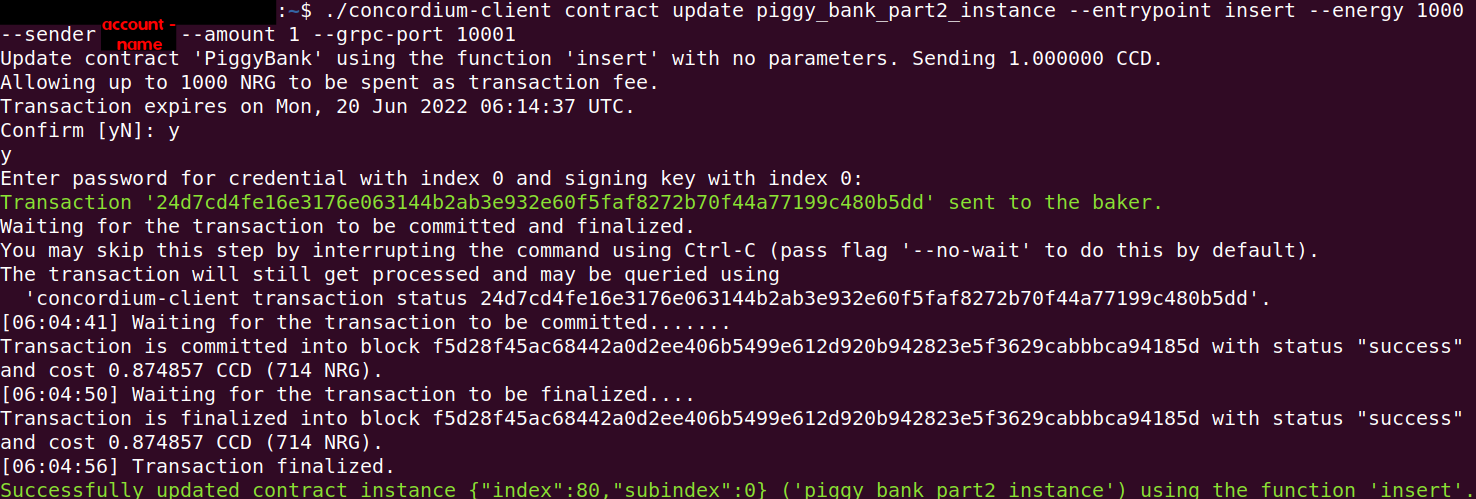
Deposit 1 CCD into the piggy bank to test if you can update the smart contract instance.
$./concordium-client contract update piggy_bank_part2_instance --entrypoint insert --energy 1000 --sender <account-name> --amount 1 --grpc-port 20001
If everything works correctly the output has a green line as follows:
Successfully updated contract instance {"index":<smart-contract-instance-index>,"subindex":0} ('piggy_bank_part2_instance') using the function 'insert'.
You can find additional information about updating a smart contract instance in this guide.
Viewing the piggy bank state#
You can display the raw return value of your piggy bank smart contract with the following command.
$./concordium-client contract invoke piggy_bank_part2_instance --entrypoint view --energy 1000 --grpc-port 20001
If everything works correctly the output has a green line as follows:
Invocation resulted in success:
- Energy used: 510 NRG
- Return value (raw):
[0,64,66,15,0,0,0,0,0]
.

You can find additional information about invoking in this guide.
Smashing the piggy bank smart contract#
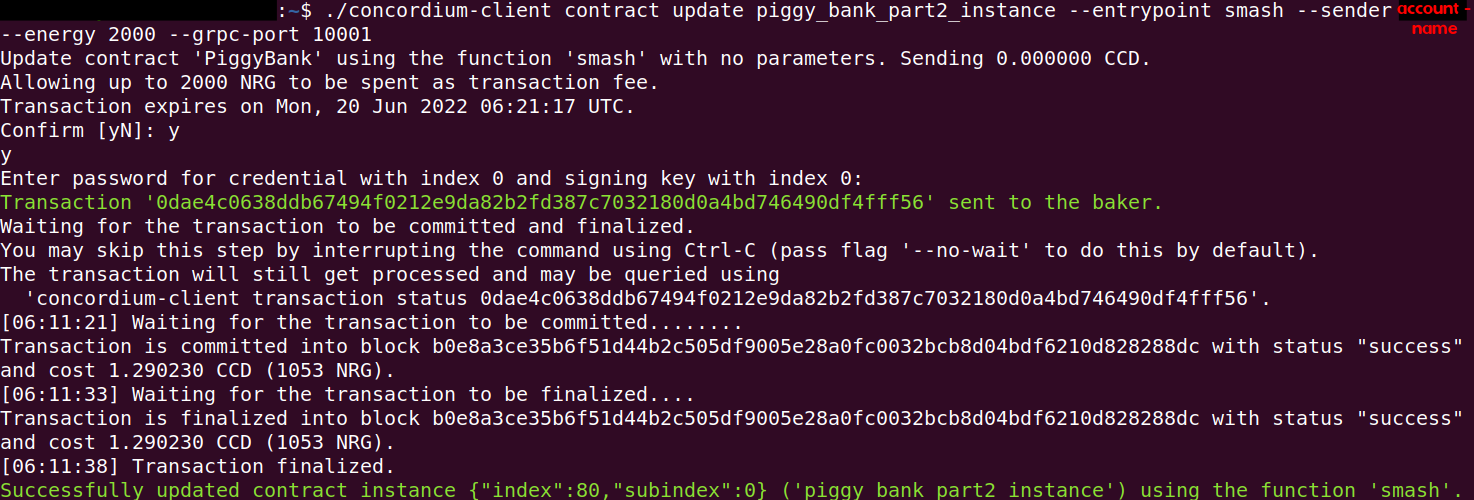
Smash the piggy bank contract to test that you can invoke this entry point. After smashing the piggy bank you cannot enter any additional CCD into the piggy bank anymore.
$./concordium-client contract update piggy_bank_part2_instance --entrypoint smash --sender <account-name> --energy 2000 --grpc-port 20001
If everything works correctly the output has a green line as follows:
Successfully updated contract instance {"index":<smart-contract-instance-index>,"subindex":0} ('piggy_bank_part2_instance') using the function 'smash'.
You can find additional information about updating a smart contract instance in this guide.
Concordium-std crate errors#
Ensure that you don’t send any CCD to the smart contract instance.
You can find explanations about the behavior of the Smash entry point in this guide.
The Smash entry point is non-payable and will print the below error message if you send CCD with the --amount flag.
The opposite is not true and you can omit the --amount flag when interacting
with a payable function without raising an error because in that case 0 CCD is sent to the payable entry point.
Error: Updating contract instance failed:
'smash' in 'PiggyBank' at {"index":<smart-contract-instance-index>,"subindex":0} failed with code -2147483636.

Note
You can find the meaning of common error codes in this list.
This error was thrown by the concordium-std crate. The error codes start from i32::MIN and go upwards.
-2147483636 corresponds to NotPayableError. In contrast, error types of the smart contract start from -1 and go downwards.
Smart contract errors#
Ensure that the --sender flag uses the <account-name>
that initialized the piggy bank smart contract instance (the owner of this smart contract instance).
You can find explanations about the behavior of the Smash entry point in this guide.
If you invoke the Smash entry point with a different account than the owner, it will print the below error message.
Error: Updating contract instance failed:
'smash' in 'PiggyBank' at {"index":<smart-contract-instance-index>,"subindex":0} failed with code -1.

Note
You can find the meaning of the piggy bank error codes in this section.
This error was thrown by the smart contract. The error codes start from -1 and go downwards.
-1 is the first error code and corresponds to NotOwner.
In contrast, errors from the concordium-std crate start from i32::MIN and go upwards.
Congratulations. You have completed the whole piggy bank tutorial.
