Upload the NFT#
Now you need to upload your asset and give it metadata. For this tutorial you will use the InterPlanetary File System (IPFS).
Using InterPlanetary File System (IPFS)#
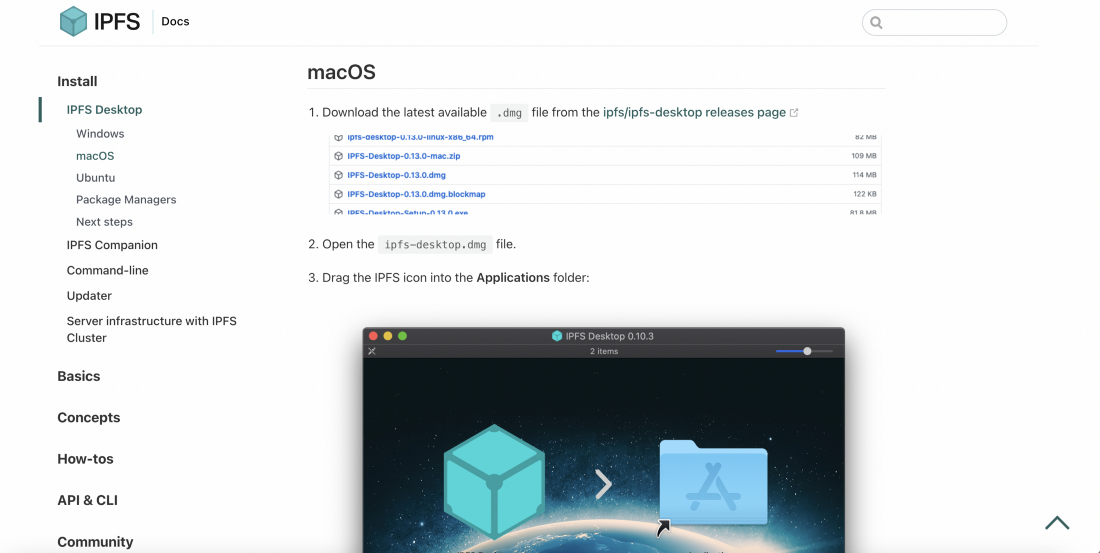
There are multiple ways of storing data in IPFS. You can do it from a user interface by running a node or you can use a pinning service. For this tutorial, you will download and run the IPFS and store the both NFT metadata and image itself. Click here to download and install IPFS.
After that, you need to import your NFT. Using the IPFS app click Import and select the image to upload.
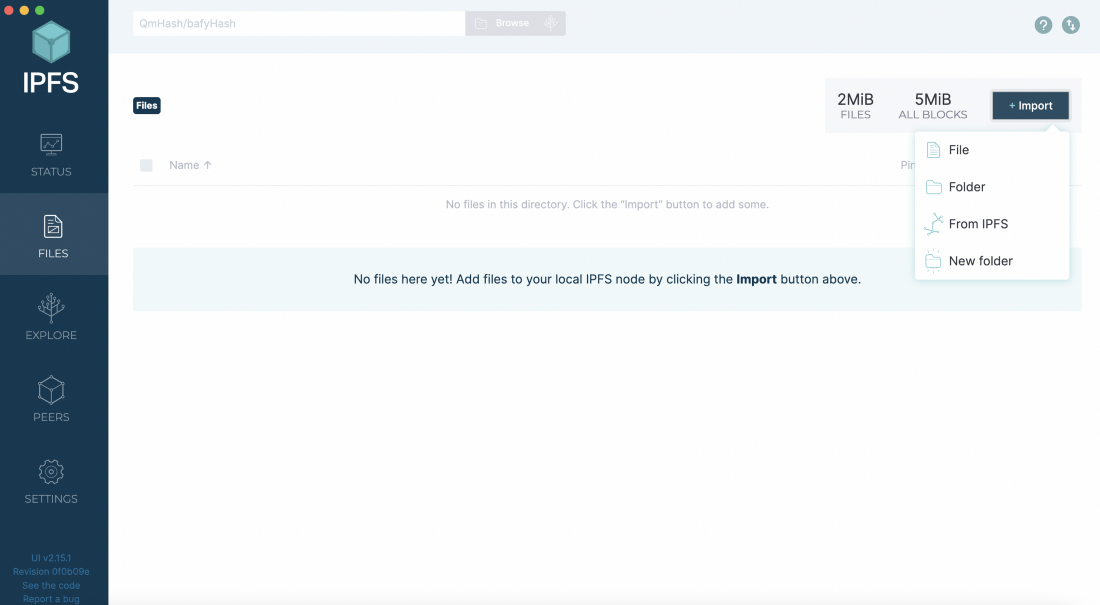
Now you should be able to see its CID or URL from the user interface. This is the important part because when you buy an NFT, it will be a hyperlink that refers to the exact location of your digital asset. So you basically are buying a link that points to a location, and you want to make sure that no one can change it. The Content Identifier (CID) value guarantees that by creating unique hash values. When you import something to IPFS it generates a Content Identifier (CID) hash value to represent the asset with strings. A hash value is an output of a one-way cryptic function that takes literally anything as an input like a word, text, image, movie, book, etc. but produces only a string of fixed size to refer to that asset. You can read more about hash from this link.
Assign NFT Metadata#
The CID of your asset is unique in the IPFS storage, and when you put that value in your metadata file, the buyer will always be able to check it using the URL and compare it to what you have and what IPFS shows.
The Concordium CIS-2 standard allows the creation of your NFT metadata in the following format, and you can find more details in the Concordium CIS-2 token standard. For the sake of the minting process, you have to follow the same formatted .json file, but as you can see, you are also allowed to add additional attributes to the metadata file, or remove them.
{
    "name": "your picture name",
    "description": "my picture description",
    "display": {
        "url": "https://ipfs.io/ipfs....paste your url here"
    },
    "attributes": [
        {
            "name": "some attribute",
            "type": "string",
            "value": "999"
        }
        {
            "name": "another attribute",
            "type": "string",
            "value": "1"
        }
        {
            "name": "third attribute",
            "type": "string",
            "value": "7.2"
        }
    ]
}
So far you have installed the required libraries, prepared a setup for our development environment, installed Docker and IPFS, and imported your first image to IPFS.
Continue to the next part of the tutorial to build your smart contract and initialize it.
