Initialize, build, and deploy the smart contract#
Now you are ready to build your smart contract. You’ll be using the cis2-nft contract template provided by Concordium.
Initialize Cis2-NFT contract template#
You will use cargo-concordium that you installed in the first part to initialize the template.
First, you need to install the cargo-generate tool and then initialize the folder. By default, it’ll create a cis2-nft contract template.
cargo install --locked cargo-generate --version 0.16.0
cargo concordium init
If you try the init command before installing cargo-generate you will get an error similar to the one below. And you may need to update your rustc version before installing cargo-generate. To do this, use rustup update.

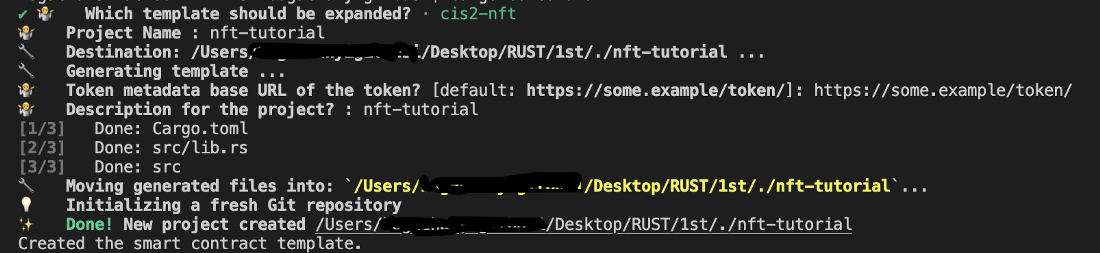
If everything is correct, the init command will show something like the below. You will have cargo project with the project name and cis2-nft contract in it.
Build your smart contract#
Now you are ready to build your contract. First, open up your lib.rs file under /src. You need to specify the TOKEN_METADATA_BASE_URL parameter in the contract. Since this is an NFT, you store a URL to its metadata on chain. Add your IPFS link like below.
/// The baseurl for the token metadata, gets appended with the token ID as hex
/// encoding before emitted in the TokenMetadata event.
pub const TOKEN_METADATA_BASE_URL: &str = "<YOUR IPFS METADATA URL HERE>";
Now, create a dist/cis2-nft folder to keep your compiled WASM module file and then build it with the following command.
cargo concordium build --out dist/cis2-nft/cis2.module.wasm.v1
Deploy your smart contract#
To deploy your smart contract you will use the concordium client command line tool.
Before deploying your smart contract, make sure that you have imported your wallet. When you export it from your wallet run the command below in the same directory where your wallet export is.
For the Concordium Wallet for Web, use the following command:
concordium-client config account import <Wallet.export> --name <Your-Wallet-Name>.json
In order to deploy you need to specify the compiled module file name and the other arguments which will be passed from the terminal. Once you run the command below, it will ask for confirmation. Type y. You will be asked to input a password.
To deploy run the command below:
concordium-client module deploy dist/cis2-nft/cis2.module.wasm.v1 --sender <YOUR-ADDRESS> --name <YOUR-MODULE-NAME> --grpc-port 20001
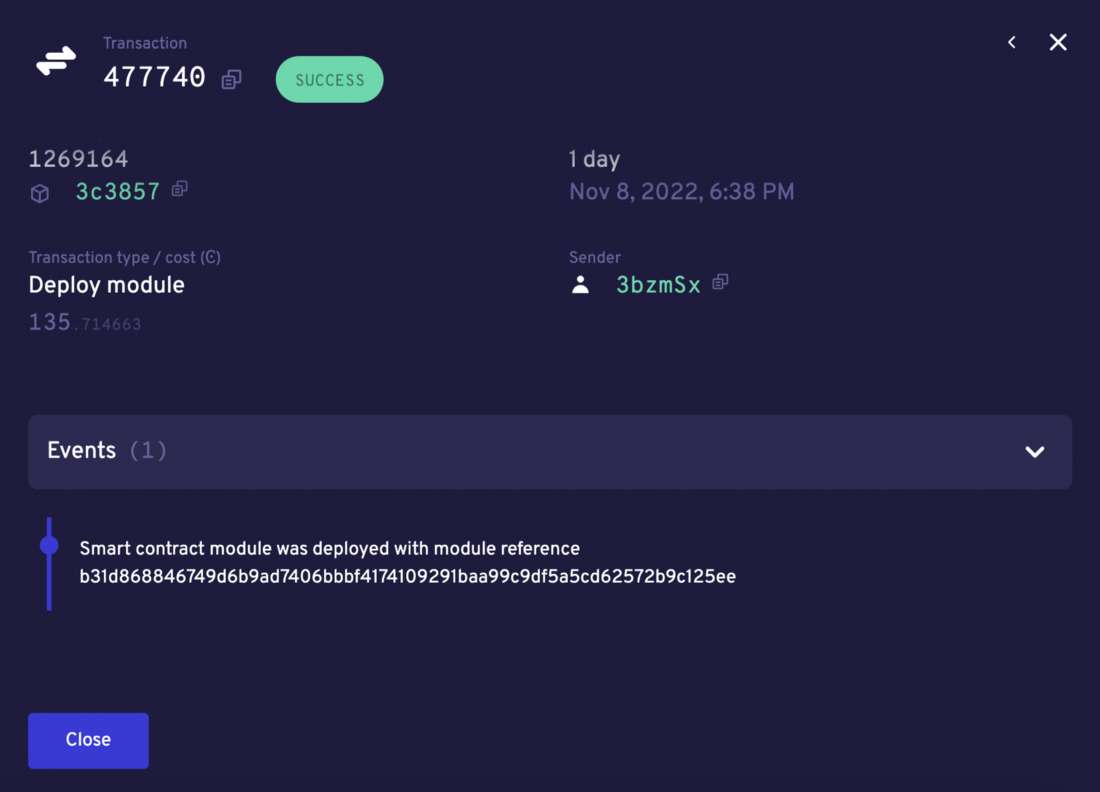
If the command is successful, you will see something similar to below.

You can also verify it either by looking at CCDScan or the testnet dashboard lookup section.
Initializing the smart contract#
After deploying a contract you have to initialize it. It’s like object-oriented programming: you create a class which is a module, and then you initialize it to create an object. It is the same here. An object of a class is a way to store both states of the class and its functionality. In order to initialize an instance of the contract you need the module name and contract, then run the following command.
concordium-client contract init <YOUR-MODULE-NAME> --sender <YOUR-ADDRESS> --energy 30000 --contract <CONTRACT-NAME> --grpc-ip 127.0.0.1 --grpc-port 20001
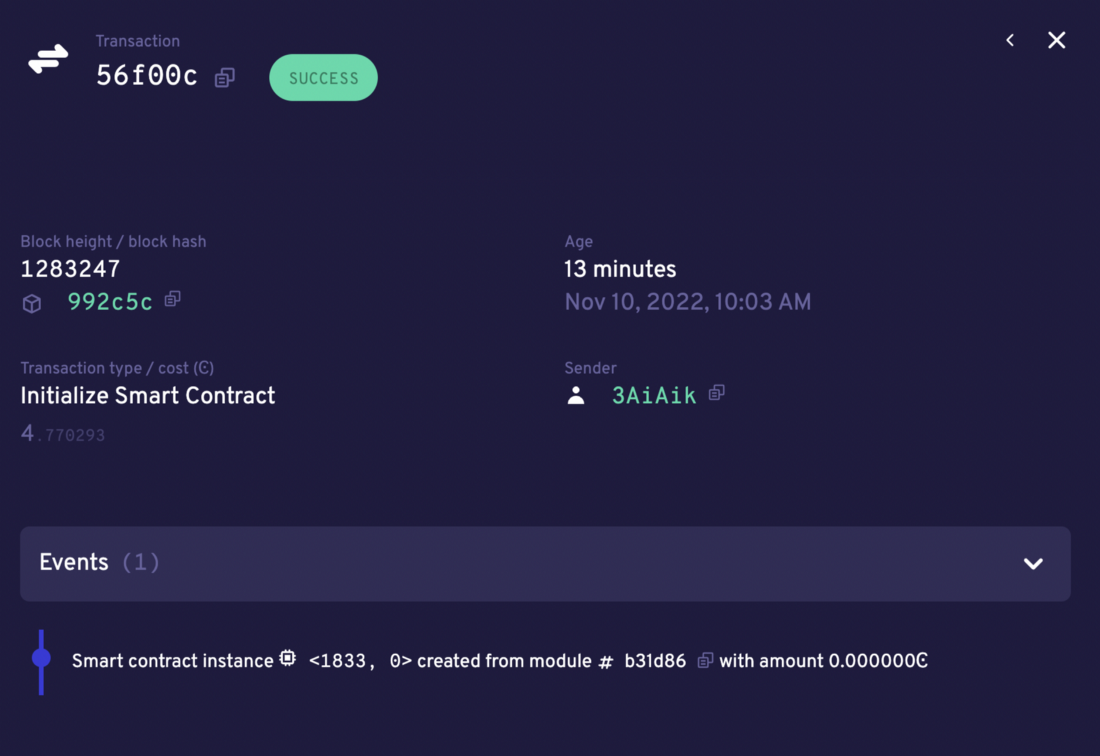
If successful, you will see something similar to the below.
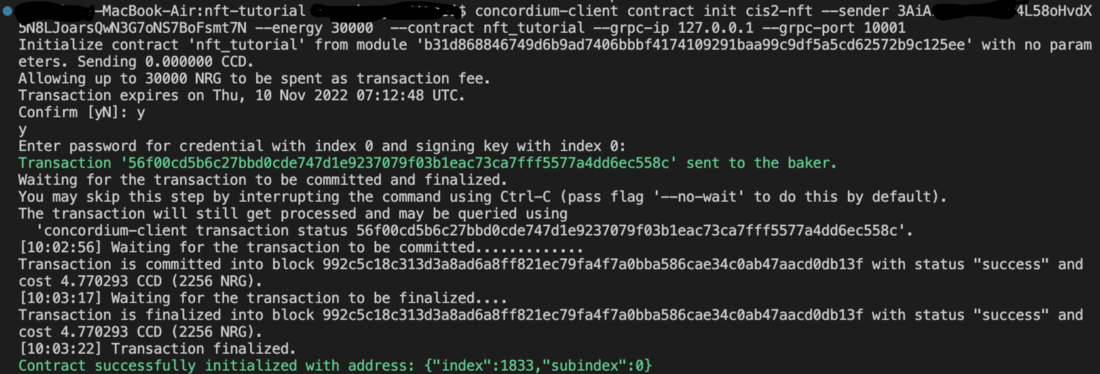
You need the index value that is the address of this instance, which in the example shown is 1833. You can check it in CCDScan.
You can even name the contract instance with following command for easy usage.
concordium-client contract name <YOUR-INDEX> --name <YOUR-INSTANCE-NAME>
Continue to the final part of the tutorial to mint and transfer your NFT.
